
WHERE AND HOW TO RECYCLE STYROFOAM

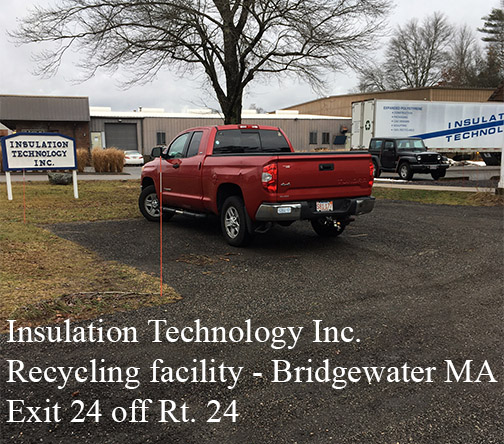
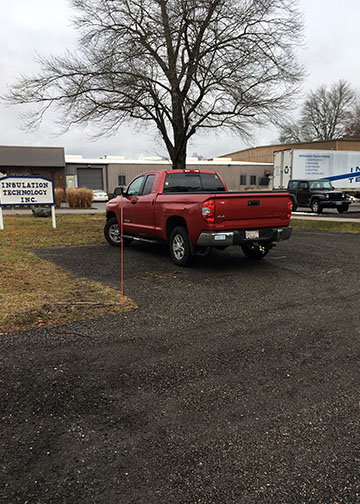
Insulation Technology recycles hard Styrofoam (such as grocery meat trays or packaging for shipping) and turns it into insulation.
Insulation Technology in Bridgewater MA is just off Route 24 near I-495. For a map, CLICK HERE


Embed a PDF viewer in your WordPress posts
Before embedding a PDF viewer in your posts, you need to upload a PDF to the Media Library. Just click on Add Media button when editing a post and upload that file. Then copy the link to the PDF file.
After that, switch the editor to the text mode by clicking on the Text tab next to the Visual tab on the top right of the editor. Then insert the follow code:
<iframe src=”https://docs.google.com/viewer?embedded=true&url=FILE_URL” style=”width: 100%; height: 400px; border: none;”></iframe>
For example:
<iframe src=”https://docs.google.com/viewer?embedded=true&url=http://littlecomptongardenclub.org/wp-content/uploads/2019/09/2019-09-00_LCGC-Common_Ground.pdf” style=”width: 100%; height: 400px; border: none;”></iframe>
***************************************************************
Members login – username: lcgc, password: compost (there is only one user)
(2019 Note: Not using this anymore) -Zone 1 login – using protected visibility within the wordpress page. Password is compost ***important *** for this to work you need to uncheck all roles at the bottom of the page.
NOTES ON BUILDING A WORDPRESS MEMBERSHIP SITE
codeinwp.com/blog/build-a-membership-site-on-wordpress/
THREE PLUGINS NEEDED: Members, Profile Builder Pro and Nav Menu Roles
1. Members Plugin Home Page: http://themehybrid.com/plugins/members
– Users > Roles > Add New > Member (with read only capability).
Write up by Justin Tadlock: Users, roles, and capabilities in WordPress http://justintadlock.com/archives/2009/08/30/users-roles-and-capabilities-in-wordpress
Documentation on github (scroll down): https://github.com/justintadlock/members
How to use the plugin
This plugin is set up to have a components-based system. The reason for this is that I don’t want to stick everyone with a bunch of features they don’t need. There’s no point in using the Role Manger feature if all you need is just a login widget and some shortcodes. So, it’s a use-only-what-you-want system.
To activate certain features, look for the “Members” link under your “Settings” menu while in your WordPress admin. When on the new page, you’ll be able to select the features you want to use.
I recommend at least activating Role Manager feature. It is at the heart of this plugin, and many other features will likely require its use in some form.
Role management
The Role Manager feature allows you to edit and add new roles as well as add and remove both default capabilities and custom capabilities from roles. It is an extremely powerful system.
Any changes you make to users and roles using this feature are permanent changes. What I mean by this is that if you deactivate or uninstall this plugin, the changes won’t revert to their previous state. This plugin merely provides a user interface for you to make changes directly to your WordPress database. Please use this feature wisely.
Editing/Adding Roles
This feature can be both a blessing and a curse, so I’m going to ask that you use it wisely. Use extreme caution when assigning new capabilities to roles. You wouldn’t want to grant Average Joe the edit_plugins capability, for example.
You can find the settings page for this feature under the “Users” menu. It will be labeled “Roles”. When clicking on the menu item, you’ll be take to a screen similar to the edit post/page screen, only it’ll be for editing a role.
In the “Edit Capabilities” box on that screen, you simply have to tick the checkbox next to the capability you want to grant or deny.
Grant, deny, or neither?
Every capability can have one of three “states” for a role. The role can be granted, denied, or simply not have a capability.
Granting a capability to a role means that users of that role will have permission to perform the given capability.
Denying a capability means that the role’s users are explicitly denied permission.
A role that is neither granted nor denied a capability simply doesn’t have that capability.
Note #1: If you were using a pre-1.0.0 version of Members, the concept of denied capabilities was not built in. In those versions, you could only grant or remove a capability.
Note #2: When assigning multiple roles to a single user that have a conflicting capability (e.g., granted publish_posts and denied published_posts cap), it’s best to enable the denied capabilities override via the Members Settings screen. This will consistently make sure that denied capabilities always overrule granted capabilities. With this setting disabled, WordPress will decide based on the last role given to the user, which can mean for extremely inconsistent behavior depending on the roles a user has.
Multiple user roles
You can assign a user more than one role by going to that edit user screen in the admin and locating the “Roles” section. There will be a checkbox for every role.
Note that the roles dropdown on the “Users” screen in the admin will overwrite all roles with a single role. So, you’ll need to edit the individual users to give them multiple roles.
Content permissions feature
The Content Permissions feature adds an additional meta box on the post editing screen.
For any public post type (posts, pages, etc.), you’ll see a “Content Permissions” meta box on the post editing screen. This meta box allows you to select which roles can view the content of the post/page. If no roles are selected, anyone can view the content. The post author, users that can edit the post, and any users of roles with the restrict_content capability can always view the post, regardless of their role.
You can add a custom error message for individual posts. Otherwise, the error message will default to whatever you have set under the plugin settings.
Big important note: This feature only blocks the post content (that’s what you write in the post editor), post excerpt, and post comments. It does not block anything else.
Shortcodes
There are several shortcodes that you can use in your post editor or any shortcode-ready area..
Parameters:
capability: A capability that has been assigned to a role.
role: A user role from WordPress or one that you’ve created.
Note that capability and role parameters aren’t used in conjunction. The code first checks for the capability (if input) then checks for the role (if input).
To check for multiple capabilities or multiple roles, simply add a comma between each capability/role. For example, the following code checks for an editor or administrator:
This shortcode has no parameters.
The shortcode is used to show a login form on the page.
This shortcode has no parameters.
Private site:The Private Site features makes sure that only logged-in users can see anything on your site. If a user visits your site and is not logged in, they are immediately redirected to your wp-login.php (WordPress login) page.
You also have the option of disabling the viewing of feed content and setting an error message for feed items.
2. Nav Menu Roles
This plugin lets you hide custom menu items based on user roles. So if you have a link in the menu that you only want to show to logged in users, certain types of users, or even only to logged out users, this plugin is for you.
3. Nav Menu Roles is very flexible. In addition to standard user roles, you can customize the functionality by adding your own check boxes with custom labels using the nav_menu_roles filter and then using the nav_menu_roles_item_visibility filter to check against whatever criteria you need. You can check against any user meta values (like capabilities) and any custom attributes added by other plugins.
IMPORTANT NOTE
In WordPress menu items and pages are completely separate entities. Nav Menu Roles does not restrict access to content. Nav Menu Roles is only for showing/hiding nav menu items. If you wish to restrict content then you need to also be using a membership plugin.
The site is managing wordpress login redirection with the Theme My Login Plugin: http://www.wpbeginner.com/plugins/how-to-add-front-end-login-page-and-widgets-in-wordpress/
Theme My Login creates its own login and logout pages when it is installed. Documentation is here: http://docs.thememylogin.com/
***** I changed visibility:hidden to the Lost Password Link on the Theme My Login CSS – like so:
/* visibility: hidden; was added into the clock below by MHH */
.tml .tml-action-links a {
visibility: hidden;
border: none;
display: block;
padding: 0;
text-decoration: none;
*******
Participants Database Documentation: https://xnau.com/work/wordpress-plugins/participants-database/participants-database-quick-setup-guide/
HOW TO REDIRECT USERS TO THE MEMBER “News and Events” Page: Use the Peters Login Redirects Plugin and set the members redirect to http://littlecomptongardenclub.org/member-news-events/
HOW TO DISABLE ‘RESET PASSWORD’ LINKS ON LOGIN PAGE: Go to the “login page” in Pages and add this short code: